+86 177 5193 6871
222, Block B, Diamond International, Guozhuang Road, Xuzhou, Jiangsu, China
The steel space frame inspection mainly has the following aspects.
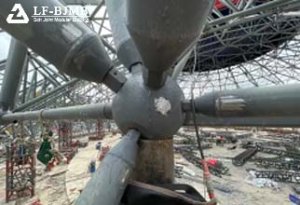
Welding ball node
1. weld inspection: the use of ultrasonic detection of internal defects, according to “ultrasonic flaw detection and quality grading method of steel structure” JG/T203-2007. weld quality level should meet the design requirements, when the design does not require, it should be in line with the GB50205-2001 second level quality standards.
2.Bearing capacity test:Weld the steel pipe and welding ball into specimen according to the design, and carry out unidirectional axial tensile and compressive test.
Bolt ball node
1. bolt ball surface inspection: 5% of each specification, not less than 5, visual inspection with a magnifying glass, or the use of magnetic particle, infiltration flaw detection inspection, the surface is strictly prohibited overburning, cracks and other defects.
2.bolt ball bolt hole tensile strength test: finished ball and high strength bolts with large screw holes for tensile strength test, to bolt threads are sheared when the load as a bolt ball limit bearing capacity value.

1. surface hardness test: GB50205-2001 requirements spanning more than 40m, building safety level for the first level of net frame bolts must be surface hardness test. Rockwell hardness tester for testing.
Rod
1. rod connection weld inspection: rod and sealing plate or cone head butt weld using ultrasonic detection of internal defects, according to the “ultrasonic flaw detection and quality grading of steel structure” JG/T203-2007. weld quality level should meet the design requirements, design requirements, should be in line with the CB50205-2001 second level quality standards. Inspection of the number of each type of rod sampling 5%, not less than 5.
2. rod bearing capacity test: rod and sealing plate or cone head of the weld for tensile strength test, the test is appropriate to take the unfavorable force of the rod, the number of test according to the same specifications of the rod for every 300 as a batch, each batch of 3 sampling.
3. Rod coating thickness test: according to the number of rods, nodes, each sampling 5%, not less than 3 pieces of similar components.
